At this point, your device is configured correctly. Now, our goal is to be able to communicate with it using a smarphone to:
-
Read temperature and humidity data registered by the device using the XBIB-C development board appropriate sensors.
-
Update the status of the User LED on the XBIB-C development board in order to turn it on or off remotely.
Test the device’s behavior using Digi XBee Mobile app
Once the Quick Setup is applied to the XBee 3 BLU device, use your smartphone to test the demo:
-
Start the XBee Mobile application on your smartphone. The Home page of the application displays.
-
Tap the Get Started option. The list of Get Started options displays.
-
Select the Remote HMI option. The Remote HMI demo overview page displays.
-
Tap the Select Device option from the second step. The Device List page displays.
-
Wait until your XBee 3 BLU device appears in the list, then select it. The Password dialog appears.
-
Enter 1234 in the password field and tap Connect.
-
Wait for the app to connect with the device. When connected, the Remote HMI demo page displays.
-
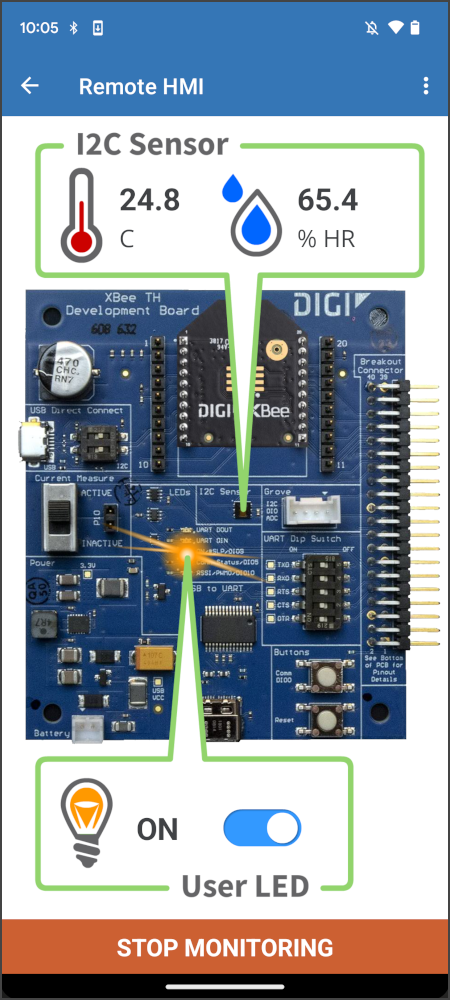
The page shows a picture of the XBIB-C development board and two boxes.
-
The first box contains two icons for temperature and humidity values and points to the I2C humidity and temperature sensor on the board.
-
The second box contains an icon for the LED with a switch and points to the User LED of the board.
-
-
-
Tap the START MONITORING button to start refreshing the temperature and humidity values. Values update every 5 seconds.
-
Tap the LED switch to turn on the User LED on the XBIB-C board. Tap the switch again to turn it off.

| In the MicroPython Terminal of the XBee 3 BLU device in XBee Studio, you can verify that the actions performed in the XBee Mobile app have been acknowledged by the MicroPython application running on the XBee 3 BLU device. Verify also that every 5 seconds it displays the humidity and temperature values being sent to the smartphone. |


