The following example shows how to us a DRM Automation to upload a python script to a DAL router and set it to automatically run.
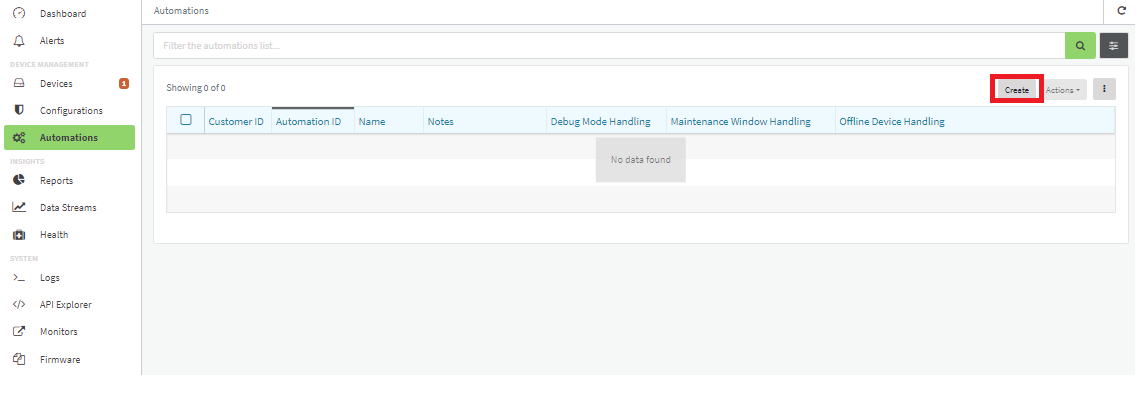
Login to your DRM account, go to the Automations Tab and click on “Create”:
Set a name for the Automation, in this example other settings are left as default. Click on “Save and continue”:

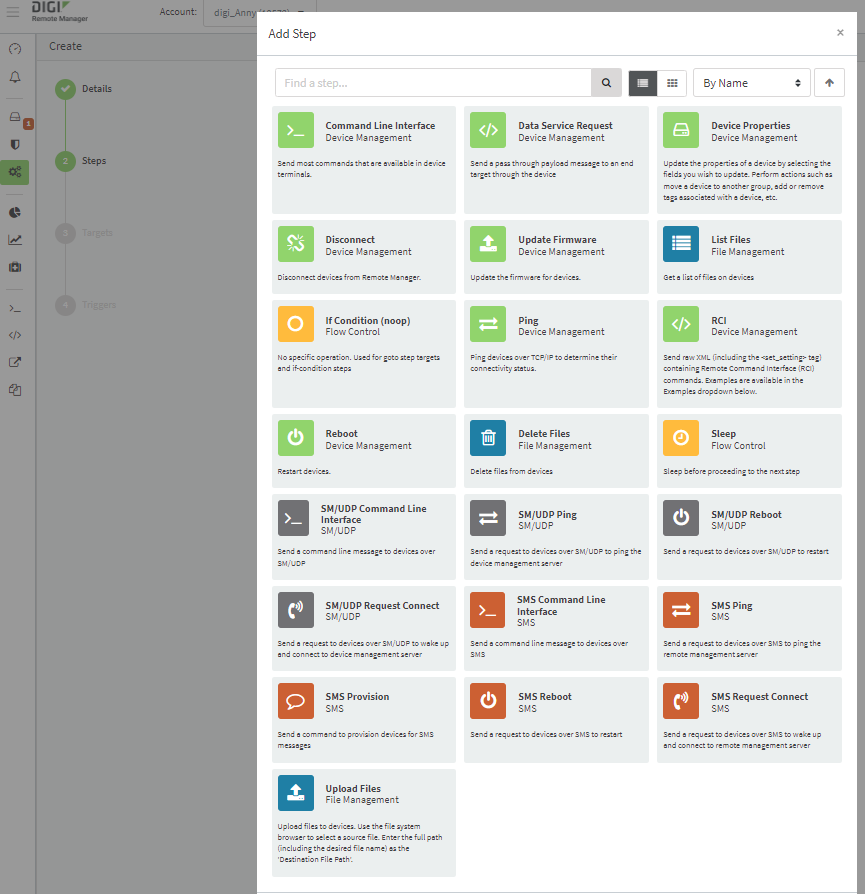
In the Steps tab, click on the + to select the first step. A list of steps is shown as below, select the “Upload files”
Click on browse and chose the file you want to upload:
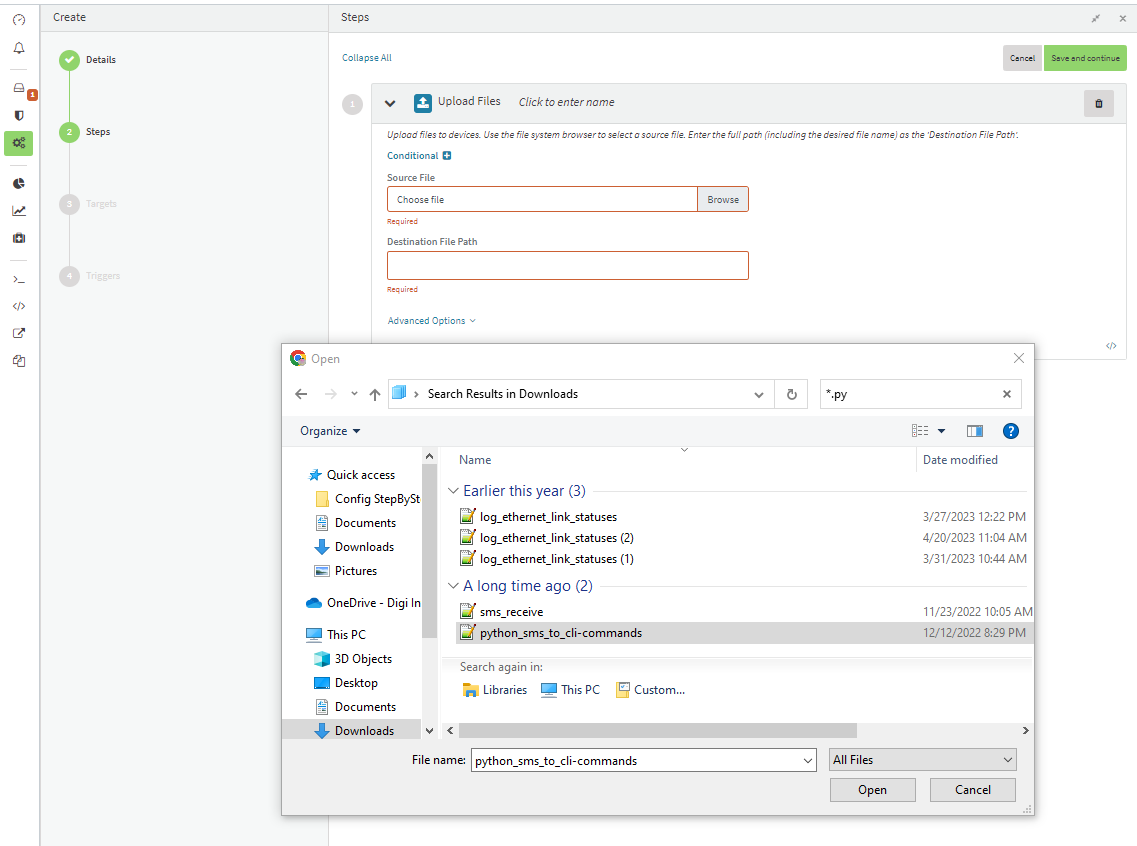
Then put the Destination File Path:
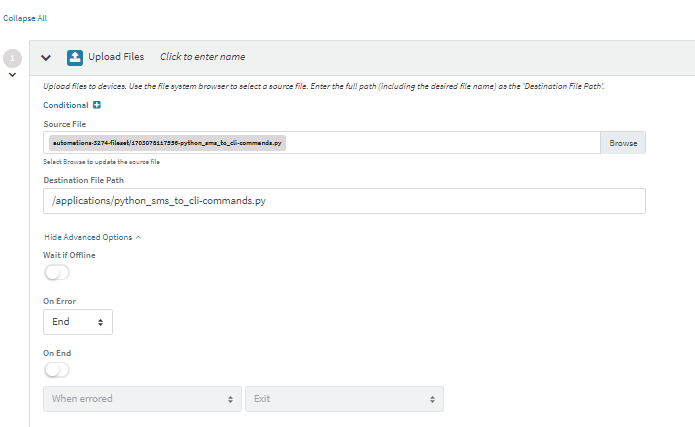
Please note that the Python File should be uploaded into the etc/config/scripts folder. In order to do that, on the DRM Automations, the folder /Applications/ need to be chosen. This will be mapped in the etc/config/scripts folder.
Then, add another step of the type “Command Line Interface” and put the CLI commands to have the Python File running at boot:
.png?lang=en-US)
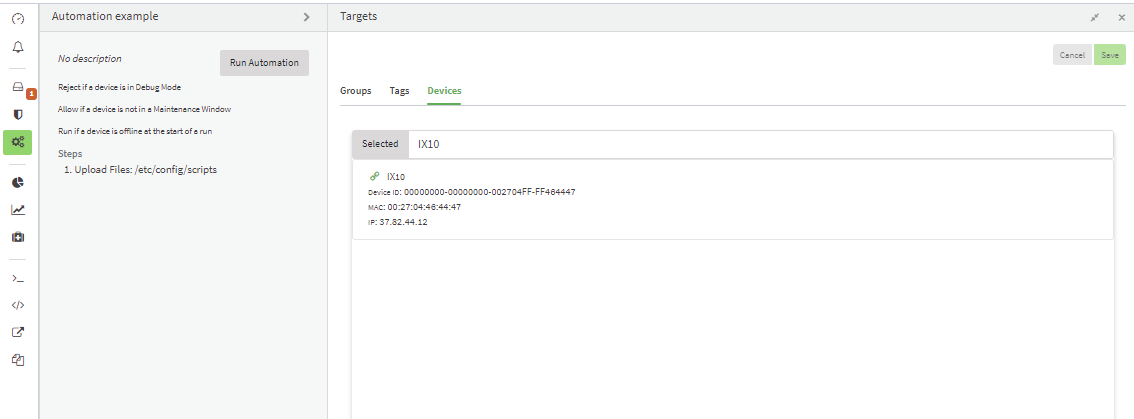
Select a target device or group (this will be used if the automation will run automatically):
Chose if the automation will be run automatically, in this example we will leave triggers as disabled and the automation will be manually started:
.png?lang=en-US)
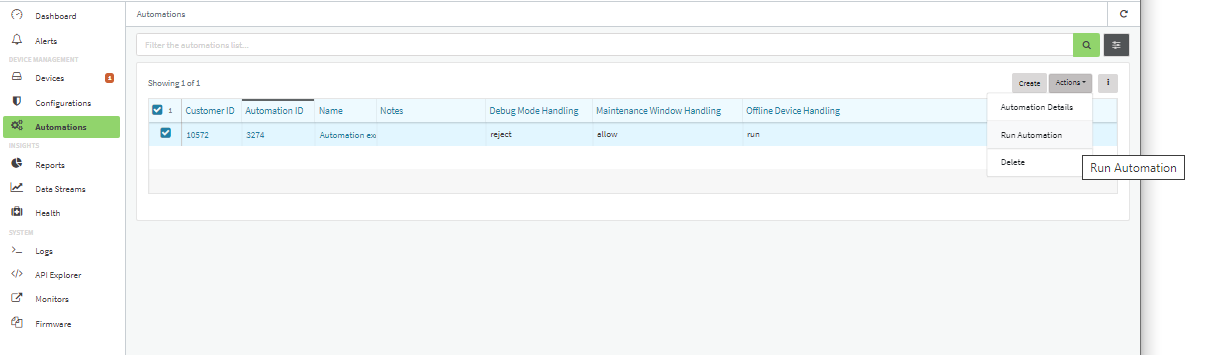
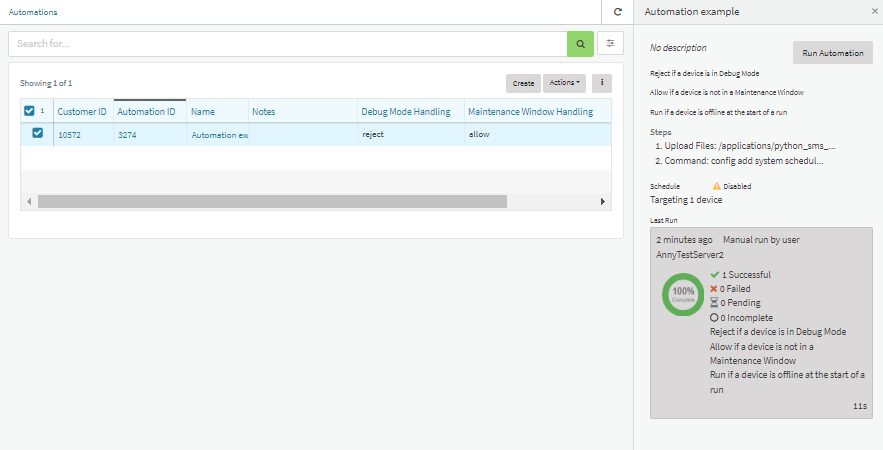
To manually run the automation, select the automation from the Automations list and select “Run Automation” from the Actions list:
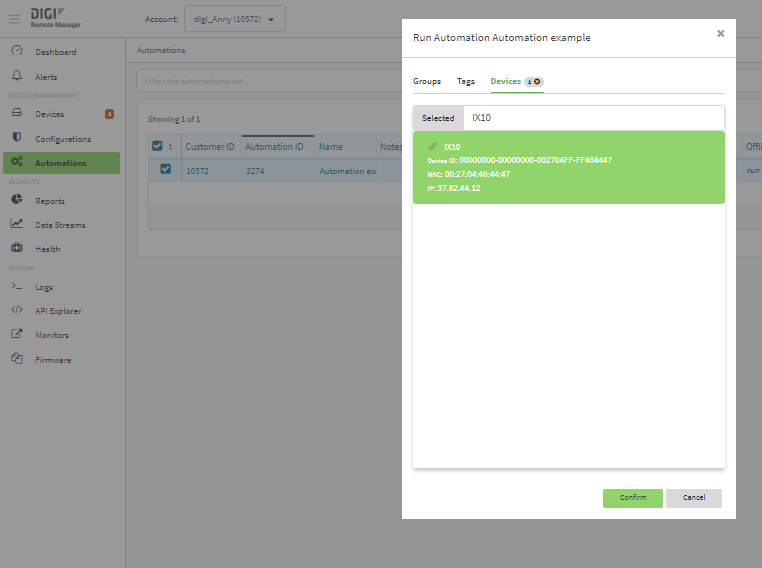
Then, select the device on which the Automation will be currently run and click on “Confirm”
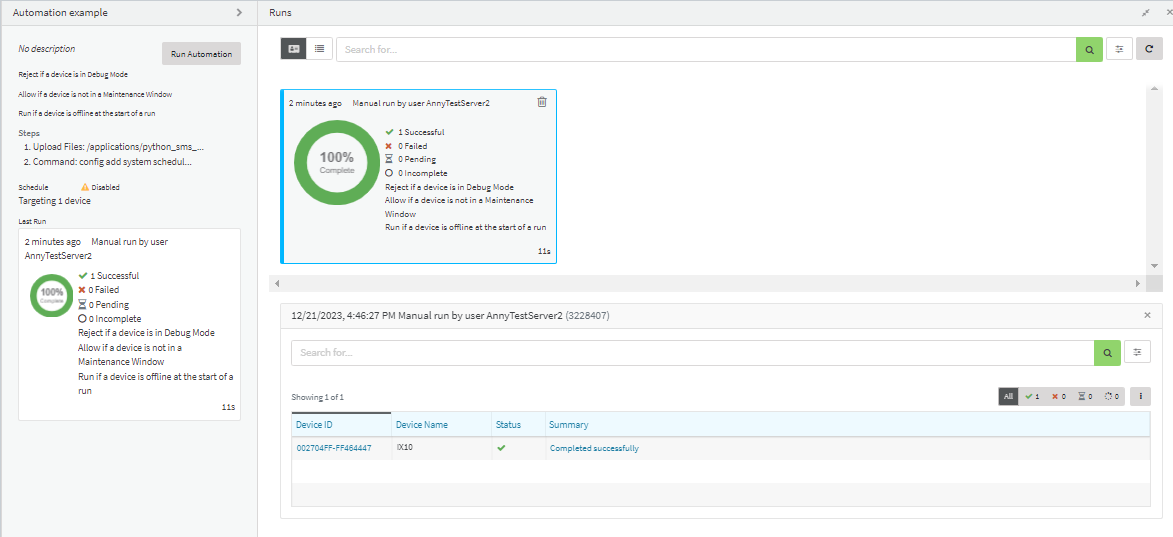
To see the result of the run, enter into the Automation:
And click on the specific run to see details:
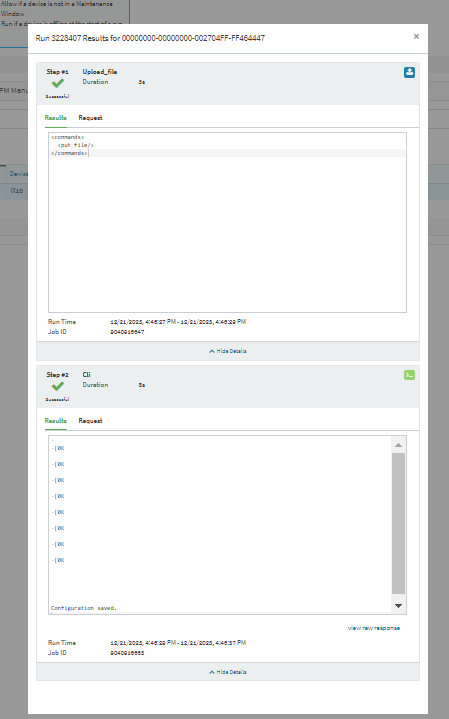
If you click on the Summary name, you will see the details about each step:
For more details about DRM Automations see here:
Digi Remote Manager User Guide - Automations
Last updated:
Jan 04, 2024