Product Requirements:
- Digi One, PortServer, Portserver TS or PortServer II Serial Server
Required Reading:
HOW TO: Access and capture output from the CommandLine Interface (CLI) of a Digi network-connected product
Procedure:
You will be accessing the CommandLine Interface (CLI) of a Digi One or Portserver family product in order to make a backup copy of the product's configuration file using the "cpconf" command.
Backing up the configuration file once the product has a tested configuration stored is useful if you ever need to install a new Portserver and want to do it the same way, or need to factory default the unit and want to restore it back to the original working configuration. The configuration file is also useful for Digi Technical Support personnel, if troubleshooting assistance is needed.
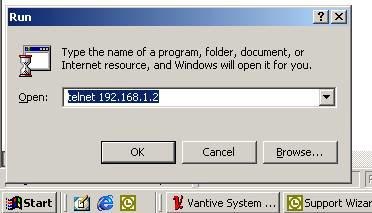
1. If using a standard Telnet client such as puTTy or TeraTerm Pro Web, telnet to the Digi One or Portserver product using the appropriate method within the application. If using an older Windows version such as Windows 2000 or Windows XP and a Telnet Client isn't available, open the Windows Start --- Run prompt, then type:
telnet <IP address> as shown in the example below, then click OK.

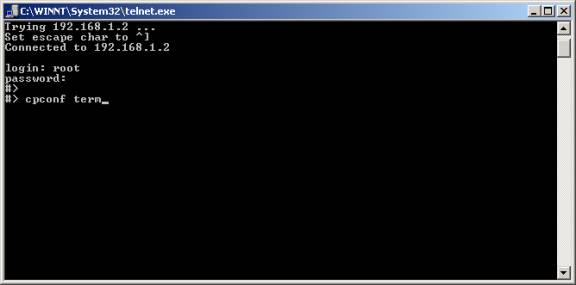
2. You should now be presented with the CLI login prompt of the Digi One or Portserver family product. The factory default login is root, password dbps. If the login has changed, you'll need to either consult the person who set it up previously or return the product to factory defaults. See the following article: How to reset a PortServer TS or Digi One RealPort to Factory Defaults
3. After login, you'll land at the CLI prompt of your product: #>.
- If using a Telnet client: Enable Session Logging or Capture at this time.
4. From the CLI prompt, type command cpconf term, then press the Enter key:

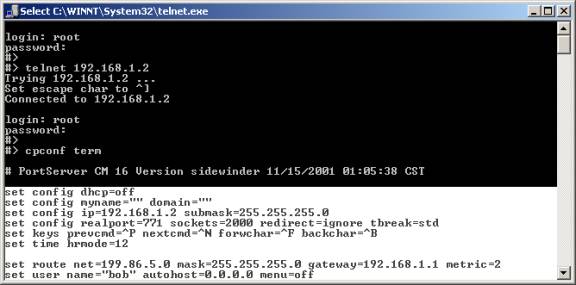
The configuration of your product should now be scrolling down your screen.
If using a Telnet client which has Capture or Logging enabled (as mentioned in step 3), skip ahead to step 9.
If using commandline telnet from Start --- Run, continue on with the following steps:
5. while holding down the left mouse button, highlight the entire configuration which had just scrolled by (starting from bottom left then moving toward the top right should work):

6. Open notepad.exe or an alternate text editor.
7. With your mouse, Right-click on the highlighted section (it won't prompt you), then hit the Ctrl-C keys together.
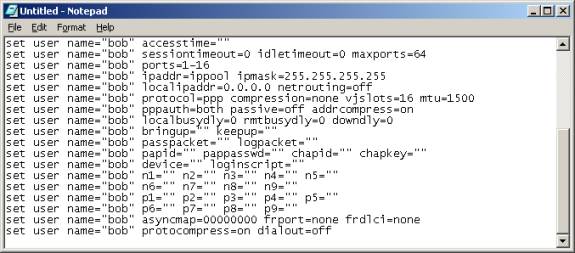
8. In the text editor, select Edit, Paste. The text from the clipboard should now be displayed in the text editor:

9. If using a text editor, select File --- Save. If using a Telnet client, stop the Logging function as enabled in Step 3.
10. Save the configuration file to your drive.
Editing the Configuration File:
Since the configuration file is just a plain old text file, you can edit the file as needed.
Example: A second Portserver TS is needed at a location where one is already installed and working on the network. The configuration file of the first Portserver TS can be used to setup the second, by making a copy of the original configuration file, then changing only the IP address to a unique number (in order to resolve the potential IP conflict, if the file were used without editing). The configuration can now be copied to the second unit, and you'll have two matching Portservers, save for the unique IP.
When a configuration file is Restored on a product, it only changes settings which are found within the file. This allows you to to remove entire sections of the configuration file (for instance, if just changing the "set ports" setting) or making the config file unique, as in the example above.
Last updated:
Jan 09, 2024