The following instructions describe how to configure the Digi TransPort’s VPN settings:
1) Log into the Web User Interface (WebUI), and navigate to
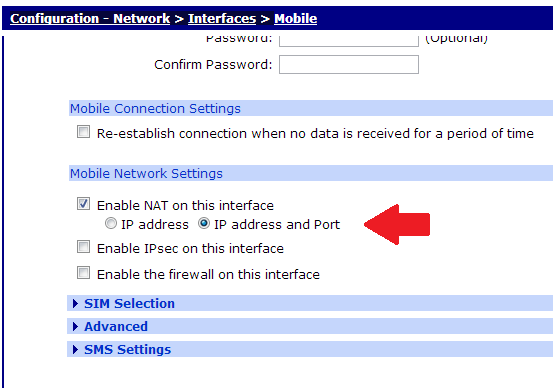
Configuration – Network > Interfaces > Mobile.
2) Expand the Mobile Settings section, and change the
Enable NAT on this interface to the
IP address and Port option, as shown in the screenshot below:

3)
Apply and
Save the changes.
4) Next, navigate to
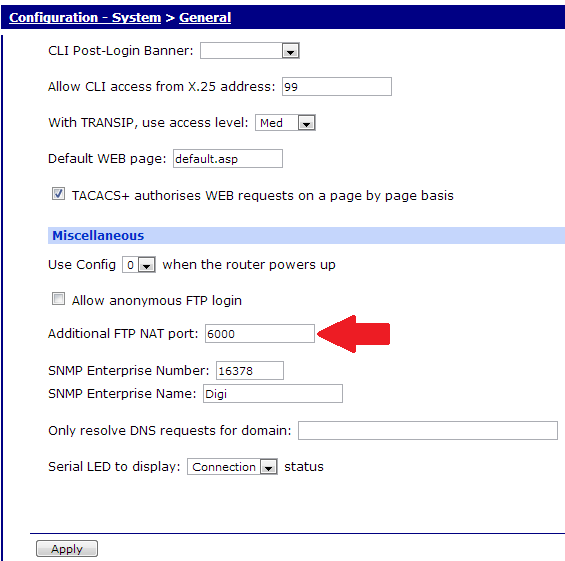
Configuration – System > General.
5) Scroll down to the
Miscellaneous section, and fill in a port number for the
Additional FTP NAT port option. The screenshot below is using port 6000:

6) Click
Apply and
Save the changes.
7) Navigate to
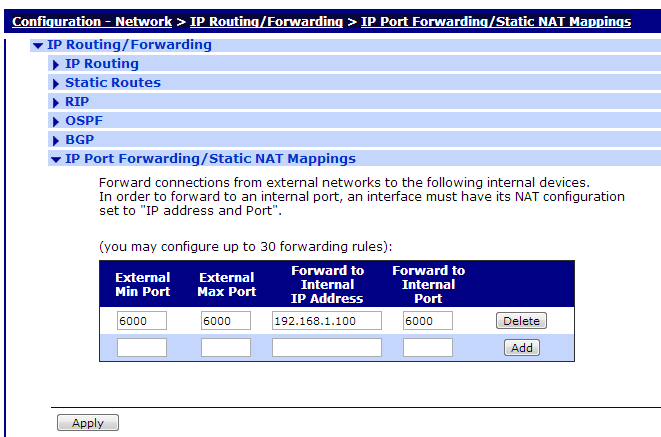
Configuration – Network > IP Routing/Forwarding > IP Port Forwarding/Static NAT Mappings.
NOTE: Use the below screenshot as a reference for steps 8-10

8) Add the port that was set on step 2 to the
External Min Port and
External Max Port fields. This example uses port 6000.
9) Add the IP address of the FTP Server in the
Forward to Internal IP Address field. This example will use 192.168.1.100 as the FTP Server IP address.
10) Add the port the FTP server listens in on for the
Forward to Internal Port field. This example will use port 6000.
11)
Apply and
Save the changes.