Overview
This article explains how to add your Digi device to a DRM account.
This article assumes that you have already set up your device to connect to the DRM and that you have a DRM account.
Procedure to Add a Digi Router to DRM
1. Login to the DRM account, go to the Devices tab and click on Add:
.png?lang=en-US)
2. Insert the Device ID, the MAC address or the IMEI of the device (in this example the MAC is used) and the default password:
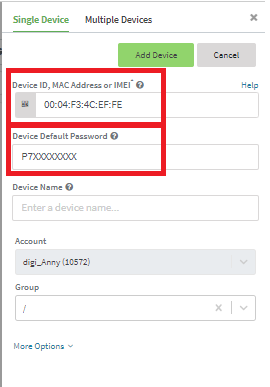
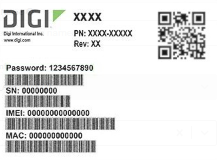
3. You can find the MAC and the Default Password on the device label:
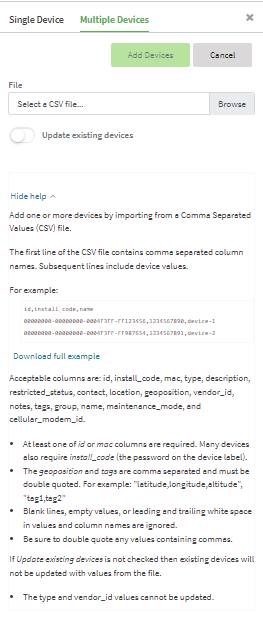
Note: You can also add multiple devces using a CSV file:
4. Once you have cliccked on Add device, you should see the device line added in the devices list, with no details in it (except the MAC/Device ID that were provided in the adding phase) and a disconnected status (red):
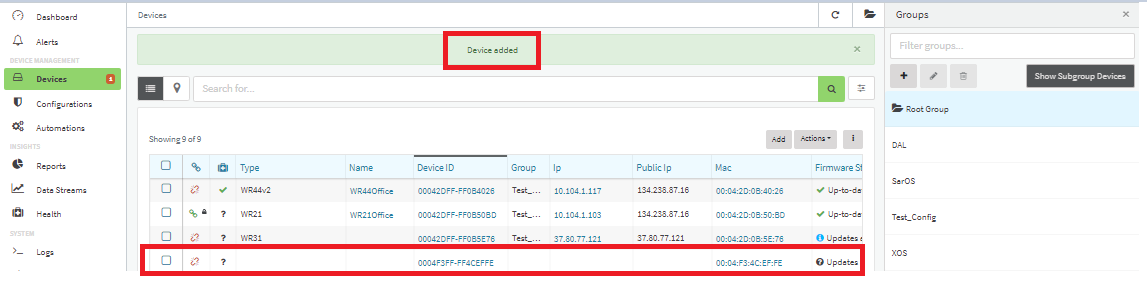
5. After few minutes, the device should be shown as connected (green) and details should be uploaded and displayed:
Now the device can be managed by DRM.
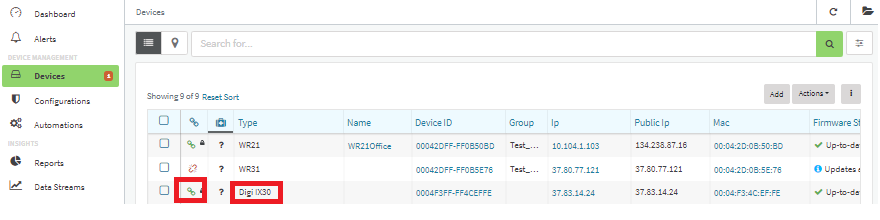
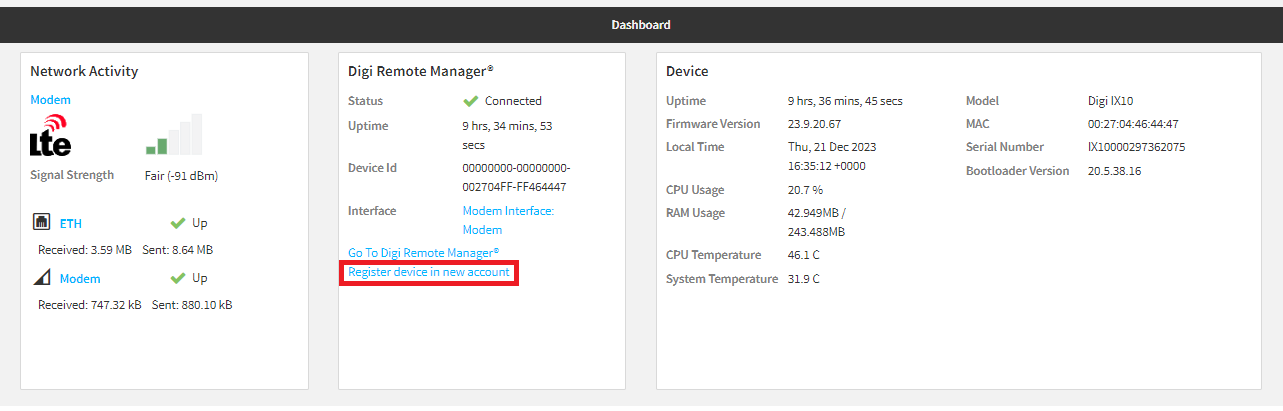
Note: for DAL devices with firmware version 23.9 and newer:
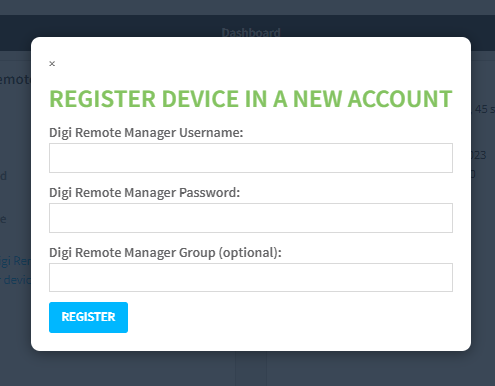
6. The device can be added to a DRM account from the local WEB UI Dashboard by clicking on the "Register device in new account" link and inserting the DRM account credentials:
Last updated:
Jan 21, 2025