Would you like to be able to keep tally of a score on a portable LCD screen with wireless pushbuttons? Then this is the project for you! This project uses an Arduino microcontroller, Mbed microcontroller, and a couple of Digi XBee radios.
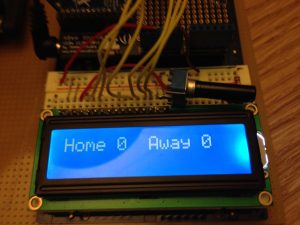 Initially 0-0
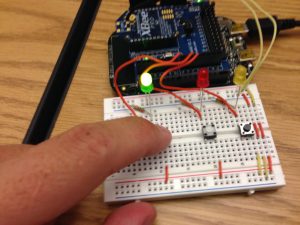 Push Home button
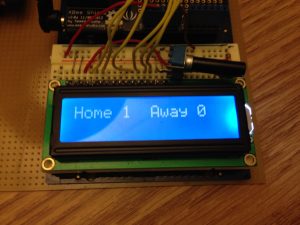 Now 1-0
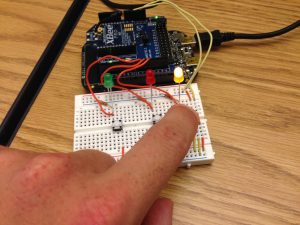
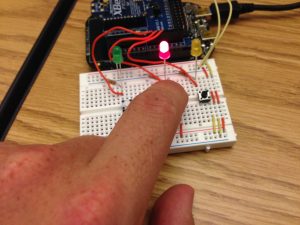 Push Home 10 more times and Away 3 times
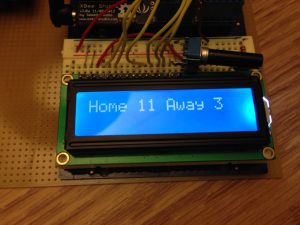 Now 11-3
 Push Reset button
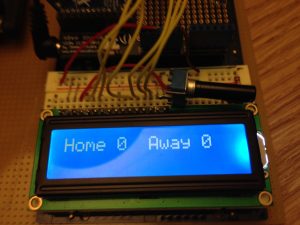 Back to 0-0
Parts:
- Two solderless breadboards (MS MKKN2, AF 64, DK 438-1045-ND, SFE PRT-09567)
- One XBee radio (Series 2/ZB firmware) configured as a Zigbee Coordinator AT mode (Digi: XB24-27WIT-004, DK 602-1098-ND)
- One XBee radio (Series 2/ZB firmware) configured as a Zigbee Router AT mode (Digi: XB24-27WIT-004, DK 602-1098-ND)
- One Arduino Uno board (MS MKSP4, SFE DEV-09950, AF 50)
- Hookup wire or jumper wire kit (MS MKSEEED3, AF 153, DK 923351-ND, SFE PRT-00124)
- USB A-to-B cable for Arduino (AF 62, DK 88732-9002, SFE CAB-00512)
- XBee USB serial adapter (XBee Explorer or Digi Evaluation board) (AF 247, SFE WRL-08687)
- Two XBee shields (Seeed Studio SLD01103P, Arduino A000065, SF WRL-10854)
- Wire strippers (AF 147, DK PAL70057-ND, SFE TOL-08696)
- One 16x2 character LCD display (with HD44780 parallel interface) (AF 181, DK 67-1758-ND, SFE LCD-00255)
- One 10K ohm potentiometer (panel mount) (DK P3C3103-ND, RS 271-1715, SFE COM-09288)
- Three 200 ohm resistor (DK P200BACT-ND)
- 16-pin single-row male header (DK S1012E-36-ND, SFE PRT-00116)
- Three momentary pushbutton switches (SPE COM-09190)
- One Mbed Freedom board (Freescale FRDM-KL25Z)
- Soldering tools (any hardware store)
- A curious mind
Using the Arduino IDE
This project uses the Arduino software, known as the IDE, in order to program the Arduino Uno microcontroller. You can download it for free from the Arduino website software section at http://www.arduino.cc/en/Main/Software. There are many versions, so be sure to download the correct one. A basic guide to how to use it can be found at http://arduino.cc/en/Guide/HomePage.
Using the Mbed Online Compiler
This project used the Mbed software, known as the online compiler, in order to program the Mbed microcontroller. You can sign up for a free account to access the online compiler at www.mbed.org. There are many versions of the Mbed, so make sure you select the correct platform. A basic guide to how to use it can be found at the same Mbed website.
Prepare and Configure your Coordinator Radio
- Use X-CTU to set the designated coordinator radio in AT mode.
- Configure the coordinator radio with a PAN ID (between 0x0 and 0xFFFFFFFFFFFFFFFF). Make sure you note this ID so that you can set up your router radio with the same one.
- Enter in the High and Low destination addresses of your router radio.
Prepare and Configure your Router Radio
- Use X-CTU to set the designated router radio in AT mode.
- Configure the router radio with the PAN ID you set the coordinator radio with.
- Set JV to 1 to ensure that your router attempts to rejoin the coordinator on startup.
- Enter in the High and Low destination addresses of your coordinator radio.
Construct the Scoreboard Buttons
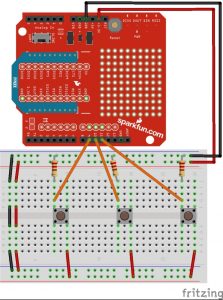 Figure 1
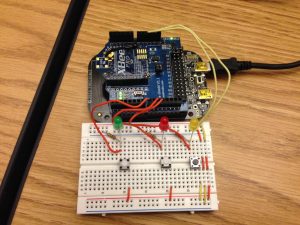 Figure 2
- Insert your Coordinator XBee Radio onto the XBee shield, and then insert the shield onto the Mbed board.
- Connect Mbed ground to the breadboard ground rail.
- Connect Mbed 3.3 volt power to the breadboard power rail.
- Connect breadboard power and ground rails on both sides of the breadboard.
- Insert a pushbutton onto the breadboard towards the left end and centered. Ensure that the pushbutton connections are on different rails. If you are unsure, you can test this using an LED.
- Connect the breadboard power to one end of the push button.
- On the other end on the opposite side of the pushbutton, connect a wire to Mbed PTD5 (shield digital pin 9). On that same breadboard rail, connect a 200 ohm resistor to ground. As an optional enhancement, you can connect the ground pin of an LED to the breadboard ground rail and the power pin of the LED to the same connection on the pushbutton in order to be notified every time the button is pushed.
- Repeat the previous 3 steps for the other two pushbuttons, spacing them evenly towards the right. The middle will connect to Mbed PTD0 (shield digital pin 10) and the right will connect to Mbed PTD2 (shield pin 11).
- Refer to figures 1 and 2 for visual reference.
Program the Mbed Microcontroller
Upload the following program to the Mbed microcontroller:
// Scoreboard
#include "mbed.h"
Serial xbee(USBTX, USBRX);
DigitalIn enable1(PTD5);
DigitalIn enable2(PTD0);
DigitalIn enable3(PTD2);
int main() {
while(1) {
if (enable1){
xbee.printf("H");
wait(.25);
}
if (enable2){
xbee.printf("A");
wait(.25);
}
if (enable3) {
xbee.printf("R");
wait(.25);
}
}
}
Construct the LCD Scoreboard
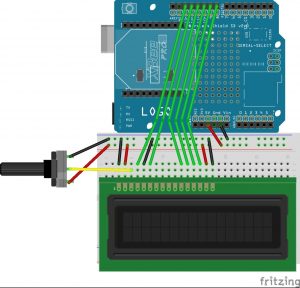 Figure 3
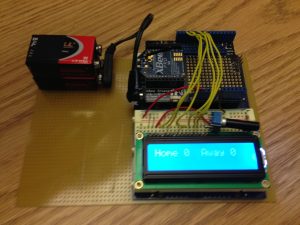 Figure 4
- Insert your Router XBee Radio onto the XBee shield, and then insert the shield onto the Arduino board.
- Hook up the Arduino ground to the breadboard ground.
- Hook up the Arduino 5 volt supply to the power supply on the breadboard.
- Connect the power and ground on one side of the breadboard to the other side using jumper wire or the metal leads cut off from resistors.
- Trim the male headers down to 16 pins and then solder the row of male headers into the LCD screen.
- Insert the LCD onto the edge of the breadboard.
- Connect the LCD pin 1 to the ground rail on the breadboard.
- Connect the LCD pin 2 to the power rail on the breadboard.
- Attach the potentiometer to the breadboard next to the LCD screen. There are three pins: two terminals (the ends) and a wiper pin (the middle). Connect one terminal of the potentiometer to power and the other to ground (it doesn’t matter which). Connect the wiper (the center pin) to the LCD pin 3.
- Connect the LCD pin 4 to the ground rail on the breadboard.
- Connect the LCD pins 5, 6, 11, 12, 13, and 14 to Arduino digital pins 13, 12, 11, 10, 9, and 8 respectively.
- Connect the LCD pin 15 to the power rail on the breadboard.
- Connect the LCD pin 16 to the ground rail on the breadboard.
- Refer to figures 3 and 4 for visual reference.
Program the Arduino Microcontroller
*when uploading the program to the Arduino board, make sure you switch the TX (connected to pin 1 on Arduino) on the XBee off. This can be done on the XBee shield.*
Upload the following program to the Arduino microcontroller:
#include <WString.h>
#include <LiquidCrystal.h>// connect to an LCD using the following pins for rs, enable, d4, d5, d6, d7LiquidCrystal lcd(13, 12, 11, 10, 9, 8);// defines the character width of the LCD display
#define WIDTH 16
int h = 0;
int a = 0;
void setup(){
lcd.clear();
lcd.setCursor(0,0);
lcd.print("Home ");
lcd.setCursor(5,0);
lcd.print(h);
lcd.setCursor(8,0);
lcd.print("Away ");
lcd.setCursor(13,0);
lcd.print(a);
Serial.begin(9600);
}
void loop() {
char point;
if (Serial.available() > 0) {
point = Serial.read();
if (point == 'H'){
h = h + 1;
lcd.setCursor(0,0);
lcd.print("Home ");
lcd.setCursor(5,0);
lcd.print(h);
lcd.setCursor(8,0);
lcd.print("Away ");
lcd.setCursor(13,0);
lcd.print(a);
}
if (point == 'A'){
a = a + 1;
lcd.setCursor(0,0);
lcd.print("Home ");
lcd.setCursor(5,0);
lcd.print(h);
lcd.setCursor(8,0);
lcd.print("Away ");
lcd.setCursor(13,0);
lcd.print(a);
}
if (point == 'R'){
h = 0;
a = 0;
lcd.clear();
lcd.setCursor(0,0);
lcd.print("Home ");
lcd.setCursor(5,0);
lcd.print(h);
lcd.setCursor(8,0);
lcd.print("Away ");
lcd.setCursor(13,0);
lcd.print(a);
}
}
}