Table of Contents
- Introduction
- Assemble the Parts
- Configure the Radio
- Wire up the Circuit
- View it!
- Use it!
1) Introduction
In this example you will learn to use a photocell light sensor with the XBee Wi-Fi to sense and take action based on the amount of available light. You use light to tell if it’s day or night of course, but you can also determine if a cabinet is open or closed, or if someone is currently occupying a hotel room. Because light changes at the speed...well of light, it's a great sensor to use when want to prototype using changes that happen instantaneously rather than only over a longer period of time. Best of all, these sensors are cheap—at about a dollar a piece, they’re a great component to use when deploying sensors in large multiples.
The resistance across the two leads of the cell varies according to the amount of light hitting the cell. With our circuit, the brighter it is, the lower the voltage that is passed to the XBee's analog-to-digital converter (ADC). This reading is then sent via Digi Remote Manager to the XBee Wi-Fi Cloud Kit's online dashboard application. Now you can monitor the brightness from anywhere right in your web browser.
2) Assemble the Parts


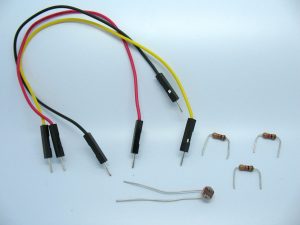
To hook up a light sensor you'll need:
6) Use it!

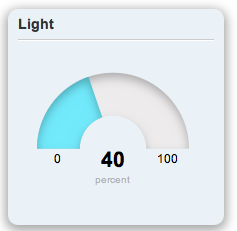
The light level is now being transmitted from your XBee Wi-Fi! Place it in some sunshine and see if you get the widget to show 100% as the sensor saturates with brightness. Cover it with a box to see it go towards 0%. You can also add a graph widget to examine the brightness data over time. See if you can sense cloudy periods, or watch the sunset data in real time. You can also run your setup from a battery pack and place it in your refrigerator. When the door is closed, does the light really go out? You might want to try setting up an Alarm in Device Cloud to alert you to late-night snackers.
There are many different light sensors available, all with different ranges and response characteristics. Most light sensors will generate data that changes very quickly.