Since DAL OS firmware 24.3.28.88 Support for WireGuard (WG) VPNs has been added.
WireGuard is a VPN protocol that operates at the network layer to provide communication between devices over a public network (more info on WireGuard website: https://www.wireguard.com/).
A DAL router can be configured in two WireGuard modes:
- Client mode: the DAL router establishes an outbound WireGuard VPN tunnel to a remote server
- Server mode: one or more remote devices can establish an inbound WireGuard VPN tunnel to the DAL router
In this article, is shown how to configure a DAL router as a WireGuard server with a Windows WireGuard client.
DAL WG Server Configuration (1st part)
- Browse to System > Device Configuration > VPN > WireGuard and add a WG Tunnel:
.png?lang=en-US)
Enable the “Device managed private key” option, to allow the DAL Router to generate its own public and private keys.
If this setting is enabled, it triggers the DAL router to automatically generate a private key and corresponding public key. This private and public key is used to establish the encrypted communication between the client and peer via the Wireguard tunnel.
.png?lang=en-US)
- Check the WireGuard Public Key, that will be needed in next steps to configure the Windows WG Client (Status > VPN > WireGuard):
.png?lang=en-US)
- Create the WG Interface (System > Device Configuration > Interfaces):
.png?lang=en-US)
.png?lang=en-US)
Note which subnet is chosen for this interface, this will be need to be configured accordingly also on the Client side.
Click Apply.
In the WG Tunnel status is shown that it is now linked to the WG Interface:
.png?lang=en-US)
Also, in the WG Interface the public key will be shown as well:
.png?lang=en-US)
Check the Public WAN IP address of the DAL router, that will be needed in next steps to configure the Windows WG Client (Note: when acting as a server, the DAL router must be reachable from the remote peers, so it will need a Public IP on the WAN interface).
In this example, the WAN used is the modem, so browse to Status > Interfaces > Modems
.png?lang=en-US)
Windows WG Client Configuration:
- Download and Install WG software for Windows: https://download.wireguard.com/windows-client/wireguard-installer.exe.
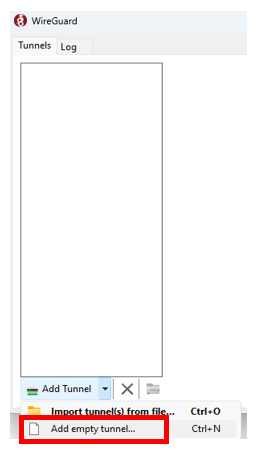
- Once installed, open the WG Software, click on the Add Tunnel arrow and select “Add empty tunnel”
The “Create new tunnel” window will be shown:
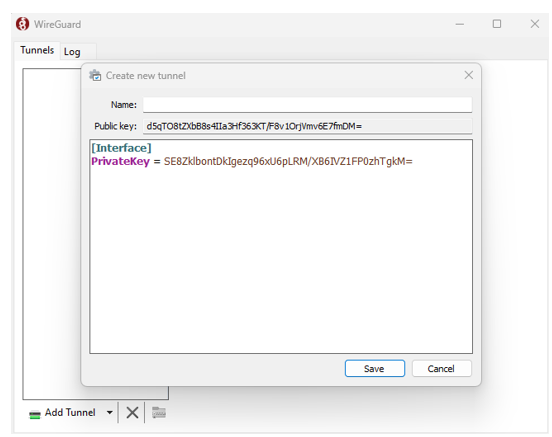
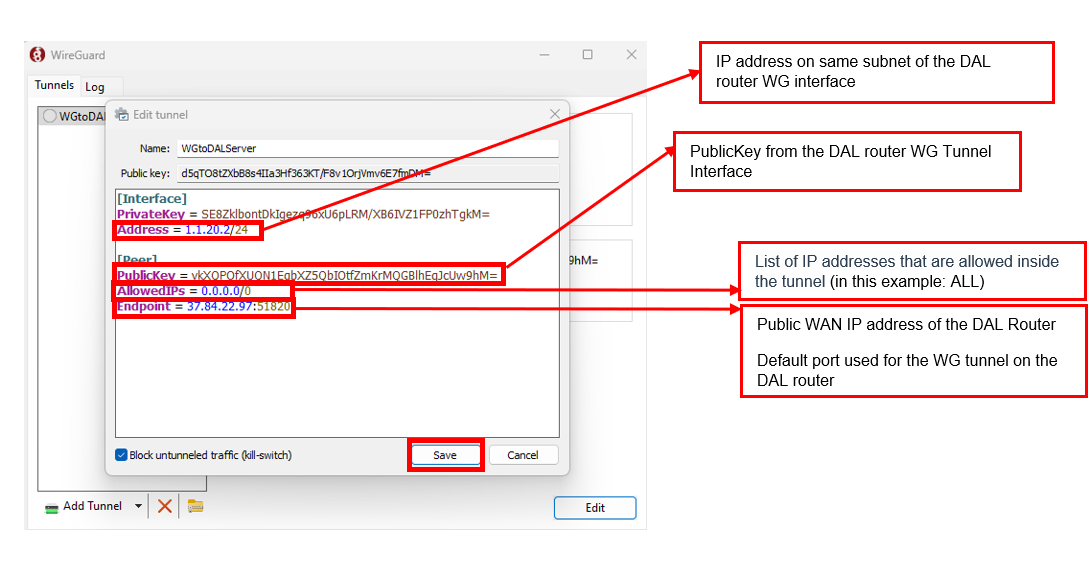
Add the following config (leaving the Interface PrivateKey as is) and click on Save:
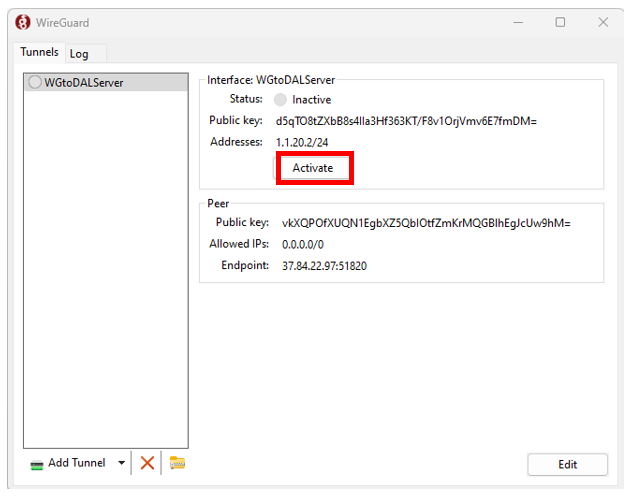
- Enable the tunnel by clicking on Activate:
DAL WG Server Configuration (2nd part)
Browse back in the WG Tunnel configuration on DAL router and add a peer under the Peers section (System > Device configuration > VPN > WireGuard > WG_Tunnel > Peers)

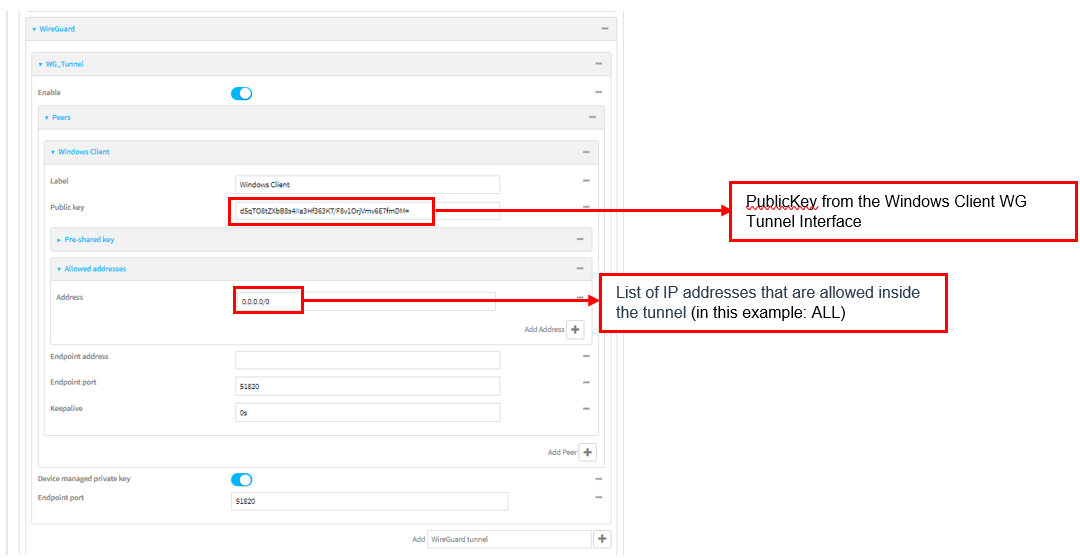
Click Apply.
Tunnel established
Check the WG Tunnel status on the DAL router, the Windows Client will be now shown:
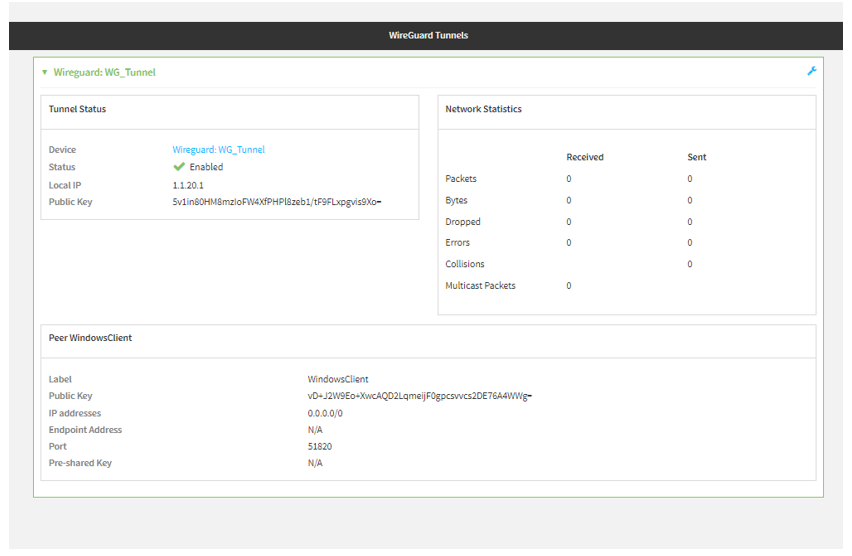
Check also the tunnel status on the Windows WG Client:
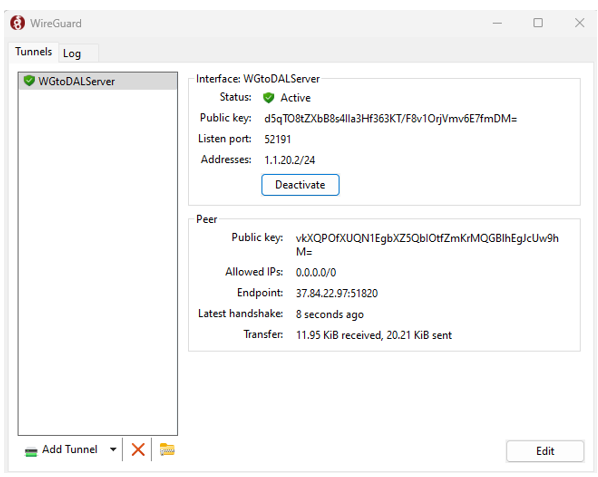
From the logs you can also see that the handshake has been completed and keepalive are received:
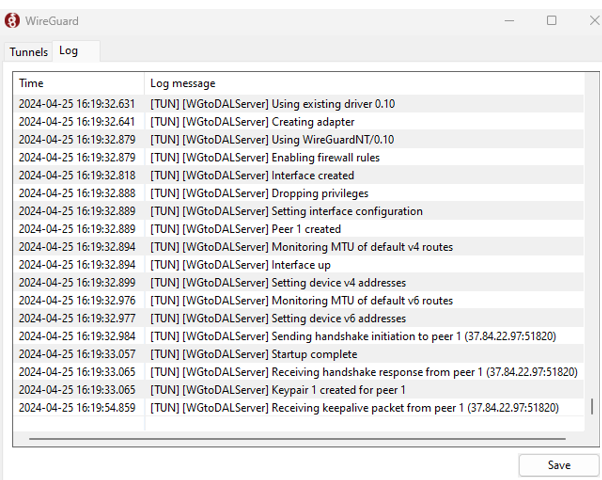
Traffic on the tunnel
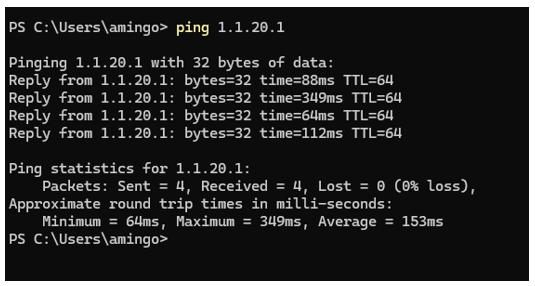
Try a ping from Windows prompt to the WG interface of the DAL router to verify the traffic is passing via the tunnel:
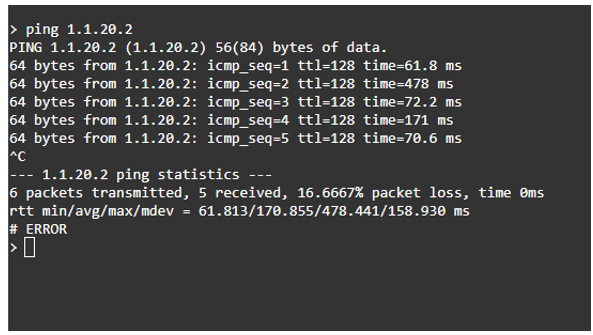
Try a ping from the DAL router terminal to the WG interface of the windows client:
Also, on the WG Tunnel status on the DAL router, an increase of traffic can be noticed:
Last updated:
Apr 26, 2024