Table of Contents
- Introduction
- Assemble the Parts
- Configure the Coordinator
- Configure the Router
- Troubleshooting
1) Introduction
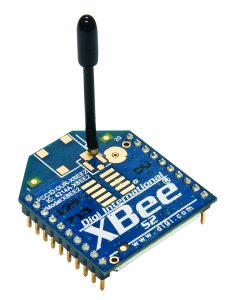
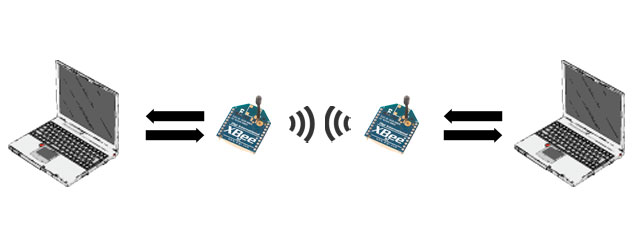
This basic chat tutorial shows you how to get wireless text chat going between two computers using Digi’s XBee ZB Zigbee Wireless Modules (Series 2). Using a serial connection from your computer, the text you type to one XBee will be wirelessly transmitted to the other XBee, which will send the text via serial to your other computer. Of course, the text will also flow in the opposite direction... after all, it’s not a chat unless both parties can type!
Don’t confuse XBee ZB Zigbee Modules Wireless Modules with XBee 802.15.4 (formerly called XBee Series 1), which aren’t compatible with XBee ZB Zigbee modules. If you have 802.15.4 Modules, check out this other how-to on getting a chat going with those components. While many of the steps are similar between these two products, there are a few fundamental differences between the 802.15.4 and the ZB modules.
2) Assemble the Parts
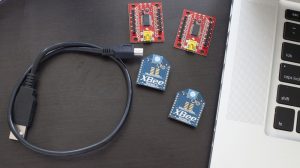
- 1 XBee ZB Zigbee Radio (Series 2), configured as a Zigbee Coordinator in transparent mode (CE=1, AP=0)
- 1 XBee ZB Zigbee Radio (Series 2), configured as a Zigbee Router in transparent mode (factory default)
Note: The basic radio with a built-in wire antenna has the part number XB24-Z7WIT-004, but if you want longer range between modules, you can also use the XBee-PRO ZB Zigbee radio, which has the part number XBP24BZ7WIT-004. See our guide on where to find XBee parts.
- 2 XBee Explorer USB Boards from Sparkfun Electronics (part number WRL-08687)
- 2 Two computers, each running a serial terminal program, or one computer running two different serial terminal programs. Using two computers is less confusing, so find a buddy if you can.
All About Addresses
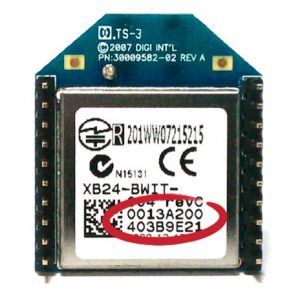 Every XBee radio has a 64-bit serial number address printed on the back. The beginning or "high" part of the address will be 0013A200, Digi's pre-assigned range of address space. The last or "low" part of the address will be different for every radio. For the radio on the right, it's 403B9E21. Write down these numbers, indicating which is the coordinator and which is the router so that you can refer to them while you're working with them.
3) Configure the Coordinator
- Start with the XBee Zigbee Coordinator AT radio you configured and mark it with an "A."
- Insert the XBee into the XBee Explorer and connect it to your computer with a USB cable.
- If you don’t already have a terminal program that you prefer to use, download CoolTerm by Roger Meier. We recommend CoolTerm because it works on Windows, Mac, and Linux. Not only that, but it’s also free!
Note: To use the XBee Explorer, you may need to install FTDI drivers onto your computer, which will let your computer talk via serial to the board. Click here to download the drivers for your operating system.
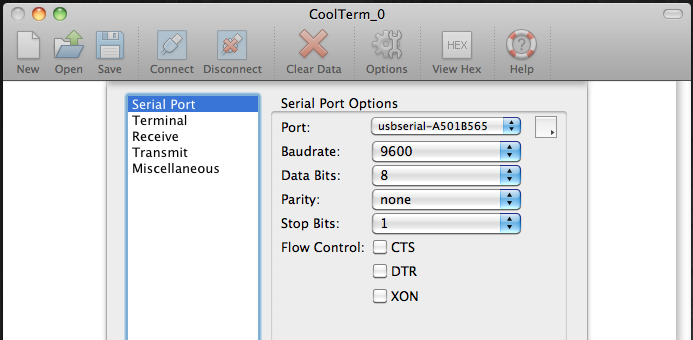
- Open CoolTerm and click “Options”
- Choose the serial port that starts with "usbserial..." If you're not sure which serial port to select, look at the list of available ports and then disconnect the XBee Explorer from your computer. Click "Re-Scan Serial Ports" and check which serial port disappeared. Reconnect your XBee Explorer, click "Re-Scan Serial Ports" and choose that port.
- Be sure Baudrate is set to 9600.
- Be sure Data Bits is set to 8.
- Be sure Parity is set to “none.”
- Be sure Stop Bits is set to 1.
- In the list on the left side of the options window, click “Terminal.”
- Be sure “Local Echo” is activated. This will allow you to see what you’re typing into the terminal.
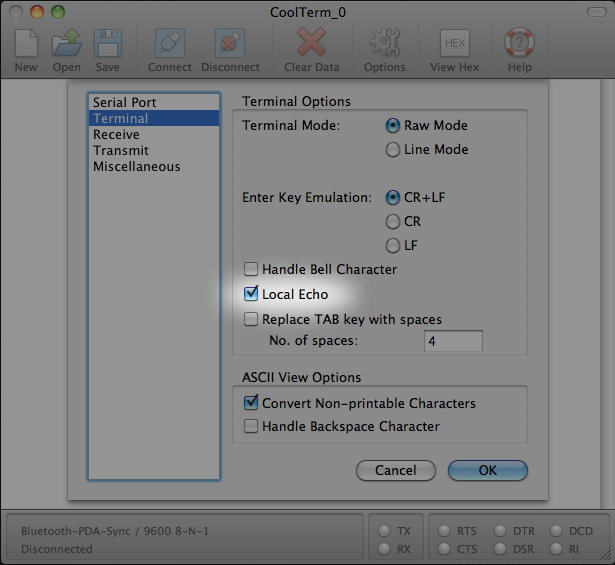
- Click OK to save those settings and close the Options window.
- Click “Connect” on the toolbar.
- You should see “Connected” on the status bar at the bottom of the window.
- Type “+++” to enter command mode. You should see the reply “OK.”
Note: By default, the XBee will automatically leave command mode if it does not receive any commands in a 10 second period.
Here’s a chart of the commands settings we’re going to set:
| Function |
Command |
Parameter |
| PAN ID |
ATID |
2001 (any address from 0 to FFFE will do) |
| Destination address high |
ATDH |
0013A200 |
| Destination address low |
ATDL |
[see your recorded Router Address] |
- Type in each command followed by its parameter and hit enter.
- You can verify the setting by typing the command without a parameter.
- Your settings aren’t saved yet! Type ATWR to save the settings.
- Here’s how the terminal session might look, starting with the “+++” to enter command mode.+++
OK
ATID 2001
OK
ATDH 0013A300
OK
ATDL 403B9E21
OK
ATID
2001
ATDH
13A300
ATDL
403B9E21
ATWR
OK
Note: You should get an OK response after issuing each command to set parameters, and another OK response when you write the changes to firmware. If you don’t get an OK response, most likely you took more than ten seconds to issue the command and you’ve dropped out of command mode. This can happen quite frequently when you’re starting out, but you’ll get better at it as you go along. The other common mistake is not issuing the ATWR command to save your changes, then losing your configuration when the radio is powered down.
- Click disconnect in CoolTerm and remove the coordinator radio from the XBee Explorer.
4) Configure the Router
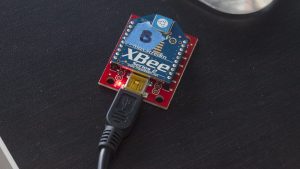
- Mark the XBee Zigbee Router AT radio you configured with a "B."
- Place the XBee into the XBee Explorer and click “Connect” in CoolTerm.
- Follow the same steps as before to program the second radio. Set the destination address to the coordinator radio's address.
See the chart below:
| Function |
Command |
Parameter |
| PAN ID |
ATID |
2001 (any address from 0 to FFFE will do) |
| Destination address high |
ATDH |
0013A200 |
| Destination address low |
ATDL |
[see your recorded Router Address] |
- Remember to type ATWR and press enter to save the settings.
5) Use It!
- Connect the coordinator radio to the spare XBee Explorer and connect it to a different computer in the same room. Load up CoolTerm and connect to it like before.
- If you’re still in command mode on either module, you can type ATCN to get out of command mode without waiting for the 10 second timeout.
- This is the moment you’ve been waiting for. If everything is set up properly, the text that you type in the serial terminal program on the first computer will be relayed to the second computer and appear on its serial terminal screen as well. If not, check the troubleshooting section at the end of this guide.
More Fun
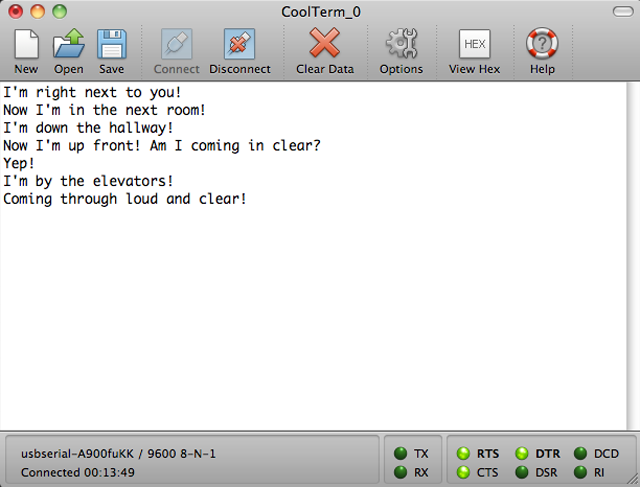
- See how far apart the modules can go before you lose the connection.
- With the Zigbee protocol, you can broadcast messages to all radios on a particular PAN ID. If you have more than two XBees, set them all to the same PAN ID (with ATID) and then set the destination low address on the broadcaster to FFFF (with ATDL FFFF). Now, when you type into the broadcaster's terminal, you should see the text appear on all the other terminals.
6) Troubleshooting
If everything works perfectly the first time around, that’s GREAT! However, experience shows that it sometimes takes a few tries to get everything right. You’ve just set up a pretty complex system. Don’t despair if your chat doesn’t work right away. In almost every case, there’s nothing wrong with any of your hardware or even with most of your setup. It takes only one wrong parameter to throw a wrench in the works. Learning how to find that wrench and fix it is an essential skill, so here are some tips on what to try if things don’t work at first.
- Start with the simple stuff. Make sure your radios are seated properly in the adapter boards and that all the USB cables are plugged in the way they should be.
- Check that each radio is responding properly in the terminal window by trying to use +++ to put it into command mode. If you don’t get an OK back, check your port selection, baud rate, and the other settings until you find the reason the radio is not communicating properly.
- If both radios are responding, use AT commands to check the settings. The most common problems are: not using the same PAN ID on both radios, not setting the destination address on each radio to the address number of the other radio, and not saving the settings properly.
- If the settings all seem to be correct, check to make sure that you have the coordinator firmware on one radio and the router firmware on the other radio. You can use the ATVR command to show which firmware is in use. If you see old version, go back to X-CTU and load the proper firmware.
- Sometimes the radios will be perfectly configured and connected but one of your radios will accidentally be talking to somebody else’s. This often happens in classroom situations, where many people are using the same PAN ID in the same room. Try using different PAN IDs for each pair.
- Sometimes setting both radios back to factory defaults and reconfiguring them will flush out a bad setting that was left over from a previous setup, or an unrecognized typo. The ATRE command will wipe out your radio’s custom configuration and leave the firmware set cleanly to factory defaults. Follow it with the ATWR command to write those defaults to the firmware, then go back to the configuration steps and try putting in your settings again.
- Don’t forget that Digi’s technical support is a great resource. While they needn’t be your first step, if you’re really stuck they can help you confirm that your radios are working properly at the hardware level. There are also a number of great online resources and forums you can read for ideas and where you can ask for more help.