Update the file system of remote devices
After an OTA firmware update of non-cellular devices, all file system data and bundled MicroPython code is erased. In order to continue running code, a new file system needs to be sent to the device after the firmware update is complete. This section contains information on how to update the file system of remote devices over the air.
Note This is only available for XBee3 devices running Zigbee, DigiMesh or 802.15.4 protocols. This does not apply to XBee Cellular devices.
OTA file system update process
Since OTA file system updates are signed, remote radios must be configured so that they can validate incoming updates. The process to set up a network capable of doing OTA file system updates is:
- Generate a public/private Elliptic Curve Digital Signature Algorithm (ECDSA) signing key pair.
- Using the generated public key, set the public key locally on all radios that will receive OTA file system updates.
- Prepare the file system on the local device. The file system of the local device will be downloaded and transferred to remote devices.
- Download an image of the file system of your local device and sign it with the private ECDSA key.
- Transfer the file system signed image to all the target remote devices.
Note The FK command cannot be set remotely. FK must either be set before the radio is deployed, or else serial access to the radio is needed to set it.
1. Generate ECDSA key pair
The security of the transfer process of file system images over the air relays on the ECDSA. As with other asymmetric cryptography algorithms, ECDSA requires a private key to sign the object and a public key to be able to read it.
To generate a valid key pair, open XCTU and follow these steps:
- In the file system manager, click the Keys button of the toolbar.

- The Generate file system key pair dialog displays. Click Generate to create a valid key pair.
- Save each generated key to a different file—we recommend storing them in different locations, for security reasons. The keys are stored in PEM files, with the extension .pem.
2. Configure the public key on all the devices in the network
XBee3 devices running DigiMesh, 802.15.4 or Zigbee protocols have a new setting that allows the configuration of the public key generated in the previous step. These are the steps to configure the public key on a local XBee device:
- In the Configuration working mode of XCTU, scroll to see the File System Options section. This section contains a setting called File System Public Key, which is configurable by a button.
- Click the Configure button. The Configure File System Public Key dialog displays.
- Click Browse... to search for the public key generated in the Generate ECDSA key pair section.
- Once the key is added, the text area displays the value of the key in hexadecimal format.
- Click OK to write the key into the module.
- Do this for all the remote modules that should have the possibility of having their file system updated over the air.
Note Configuring the public key can only be done locally. All the nodes of the network must have the public key configured before deployment.
3. Prepare the local file system image
To update the file system on a remote device, you must generate the file system image with the local XBee device. This means that all the files that the file system of the remote devices should have must be replicated in the local device first.
4. Download a signed file system image
It is necessary to generate a file that contains an image of the file system to be transferred over the air to the remote devices. As stated previously, the image is generated with your local device, and is transferred to the remote devices afterwords.
Note The local module used to create the file system image must have the same firmware version installed as the target module or the file system will be rejected. Use the VR command to check the version number on both, the local and remote, devices.
To generate the OTA file system image, follow these steps:
- In the file system manager, Open the connection to your local device.
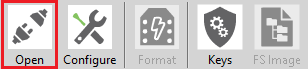
- Once the connection is established, click FS Image.

- The following dialog displays:

- Click Browse... to find the private key generated in the Generate ECDSA key pair section. This key is used to sign the file system image once it is downloaded into your computer.
- Click Save. A file dialog opens to let you decide where to store the signed file system image. The extension of the generated file is .fs.ota.
5. Transfer the image to a remote device
To send the generated signed file system image to a remote device over the air:
- Once a local device is added to XCTU, discover the target remote device by clicking Discover radio nodes in the same network in the appropriate panel of the local XBee device.

- Once the remote device that you want to update the file system of is found, add it to the list of remote devices.
- Click the remote device to read its settings.
- Click Update on the Radio configuration working mode toolbar.

- Click Update file system on the context menu.

- A file dialog displays to let you select the signed file system image generated in the previous section.
- The transfer process starts automatically.
 PDF
PDF


