Define a static IP address
You can configure a static IP address for the Connect EZ.
-
Log into the Connect EZ WebUI as a user with full Admin access rights.
-
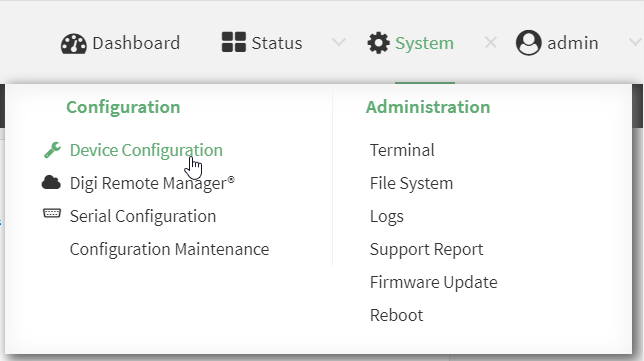
On the menu, click System. Under Configuration, click Device Configuration. The Configuration window is displayed.
-
Click Network > Interfaces.
-
-
Enable: Selected
-
Interface type: Ethernet
-
Zone: Edge
-
Device: The option matches the selected Ethernet: Device: ETH1, Device: ETH2, or Device ETH.
-
-
Configure IPv4 settings.
-
Click to expand IPv4 settings.
-
Enable IPv4 support, if it is not enabled. This is enabled by default.
-
For Type, select Static IP address.
-
For Address, type the IP address and subnet of the LAN interface. Use the format IPv4_address/netmask, for example, 192.168.2.1/24. For more information about the netmask, see IP address and netmask.
-
For Default gateway, type the default gateway associated with this network interface.
-
-
(Optional) Add DNS servers to use with this static IP address.
-
Expand the DNS Servers section.
-
Click the plus sign icon next to Add DNS server.
-
In the DNS server field, enter the IP address of the DNS server.
-
Repeat this process if you want to add another DNS server.
-
-
Click Apply to save the configuration and apply the change.
 PDF
PDF


