Welcome to our series on the XCTU tool. As described in an earlier post, (Top 12 Digi XBee Management Tools in Free XCTU), Digi XCTU® provides a host of useful features for creating, deploying, managing and testing Digi XBee® radio networks. Even the basic features contain some hidden gems, so well begin with a quick walk-through of the XCTU Configuration mode to highlight the contextual support that puts you fully in charge of your XBees.
Step 1
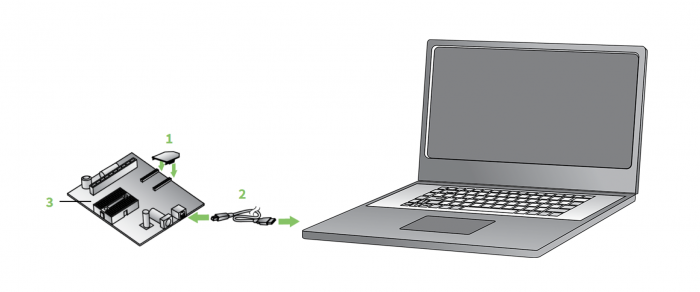
Begin by downloading and installing XCTU. If you need detailed instructions, refer to the XCTU User Guide. Next, mount a Digi XBee on an XBIB evaluation board, a Grove development board or similar. Connect that board to your computer with a USB cable. (Additional details are available in the documentation for the Digi XBee 3 Zigbee Kit and the Digi XBee 3 LTE-M Kit.)

Step 2
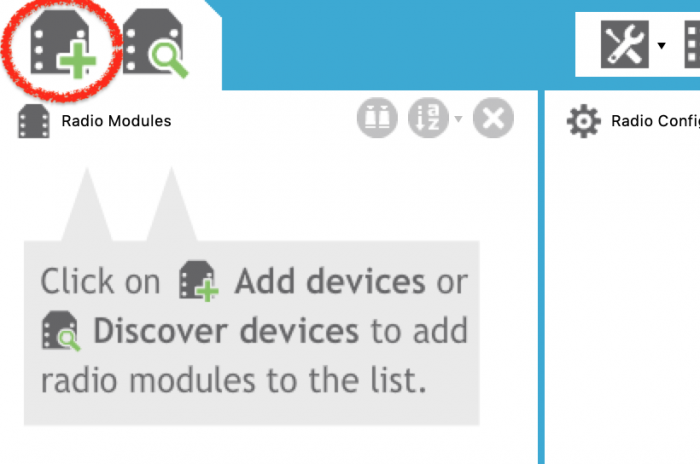
Open XCTU and click the Add Devices icon, then select the correct USB port and baud rate (9600 is the XBee default). Click Finish to add the module to your device list.

Step 3
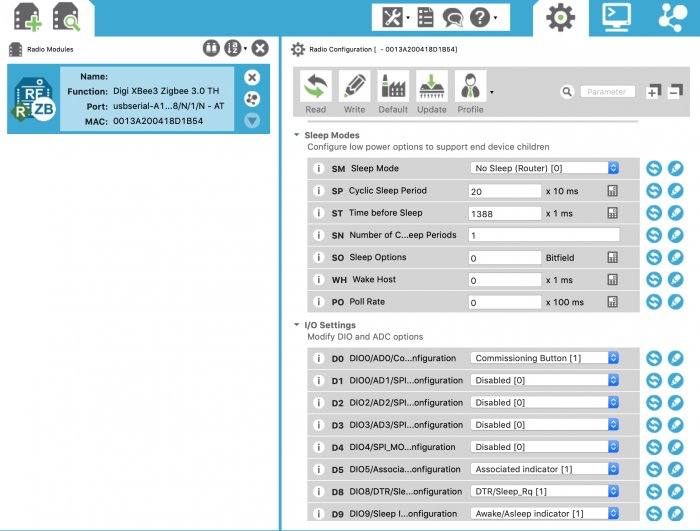
Clicking on a module in the device list on the left will display its configuration on the right. There are a lot of settings! Some modules have 70 or more different configuration options, but XCTU has your back. Clicking the "i" for information icon  will display contextual help including a brief explanation of the feature, how to set it, and the factory default value. For example, lets say we want to configure an XBee 3 Zigbee module to sleep for twenty seconds, then wake up for one second to check for data, repeating this cycle indefinitely.

Scroll down to the Sleep Modes section. You can use the + and - buttons  at the top of the right section to collapse and expand the configuration setting categories. You can also search for the setting code, for example SM for Sleep Mode, which is what well look at first.
Step 4
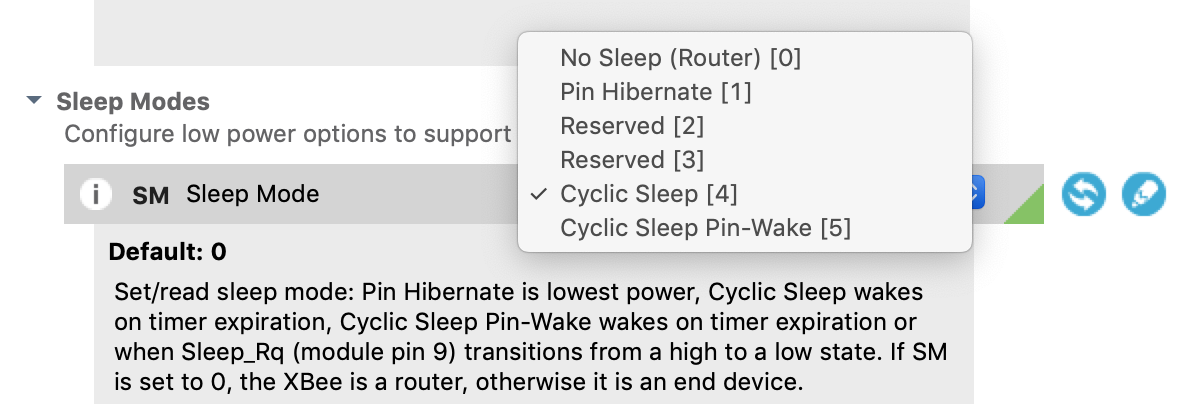
When youve located the Sleep Mode (SM) setting, click on the information icon to show the description for that parameter. For the XBee 3 Zigbee the text reads:
"Set/read sleep mode: Pin Hibernate is lowest power, Cyclic Sleep wakes on timer expiration, Cyclic Sleep Pin-Wake wakes on timer expiration or when Sleep_Rq (module pin 9) transitions from a high to a low state. If SM is set to 0, the XBee is a router, otherwise it is an end device."
We know we want the XBee module to sleep and wake up repeatedly according to a timer. Cyclic Sleep mode sounds exactly like what we want. Go ahead and set SM to "Cyclic Sleep [4]". To hide the text description, simply click the information icon again. Finally, click on the pencil to write your change to the firmware.

Step 5
Next we want to set two different sleep timers. One will tell the XBee how long to sleep, and the other will tell it how long to stay awake between naps. Well start by looking at the Sleep Period (SP) setting.
There are three different types of help available, just for this one setting.
- The first is the information description. Click the info icon to see a brief description of this parameter, including some implementation notes.
- Secondly, a mouse hovering over the text entry box pops up a helper window that shows the full hexadecimal range for this parameter along with a translation of the current hex code with x10 multiplier into human-readable milliseconds. We know we want our XBee to sleep for 20 seconds. Thats 20,000 in milliseconds but what is it in hex?
- That brings us to the third type of help. At the right youll see a calculator icon. Click on it to display a window where you can enter values in milliseconds that are automatically translated to hex codes with the proper multiplier. Enter 20000 milliseconds here and the correct hex code for this parameter, 7D0, is automatically generated.

To set how long the module should stay awake well use the Time before Sleep (ST) setting. We want the module to sleep for one second or 1000 milliseconds. The calculator will use STs x1 multiplier to generate the correct hex code setting. Using the calculator for ST, enter 1000 ms. The resulting hex code should be 3E8.

Step 6
Theres an additional type of calculator thats tremendously useful when working with bitfield settings. Bitfields are essentially binary feature switches that are set using a hexadecimal. Theyre often used for setting different options on and off, or configuring which radio channels to use.
You can see one example of a bitfield right in this Sleep section, the Sleep Options (SO) setting. Pop open for a description of the parameter. In this case, most of the options are reserved for later use so the only bit you could set is Bit 2, if you wanted extended sleep mode. While we dont need to turn this on, if you wanted to you would simply click on the calculator icon, and then click the bit under "02" to activate it. (The resulting hex setting would be 4).

It may be helpful to see bitfields used in another context. The Digi XBee 3 Zigbee can operate on up to 16 different channels. Its Scan Channels (SC) setting stores a bitfield that defines which channels it can operate on. Click on the calculator for this setting to see how nearly all channels are in use by default. Each bit defines one of the channels, so to turn off the channel linked to bit 7 for example, you can simply click on it and deselect it.

Remember that your selections are only saved to firmware when written with one of the pencil icons. To restore a module to its defaults, Click Default at the top of the right section, then save those changes with the pencil Write button next to it.
Everyone knows that Digi XBees are a breeze to set up, and that they also offer powerful configuration options. XCTU provides all the assistance needed, with contextual help for every option on every single XBee. Calculators are also available to assist with inputs. Confused by Sleep Modes? Simple click the info icon to learn more. Need to determine the bitfield for channel scanning? Select the desired channels with the inline calculator and the rest is done for you. XCTU puts you fully in charge of your XBees and makes it easy to use their powerful features.